How to Edit Real Estate Photos Like a Pro
Photo Editing
2026/05/06
In real estate, photos don’t just support a listing—they sell the story. Buyers scroll through dozens of properties in minutes, and the difference between a click and a skip often comes down to image quality. This is why understanding how to edit real estate photos is no longer just a technical skill—it’s a strategic advantage.
Introduction: Why Knowing How to Edit Real Estate Photos Is a Game-Changer
Well-edited images can dramatically influence how a space is perceived. A dim room can feel bright and inviting. A small space can appear open and functional. Even subtle adjustments in lighting, color, and composition can increase perceived property value and shorten time on market.
But editing real estate photos is not about making a property look unrealistic. It’s about presenting the home at its best—clean, balanced, and true to life. In this guide, you’ll learn how to edit real estate photos like a professional, with a workflow that combines efficiency, consistency, and high-impact visual results.
Understanding What “Professional” Real Estate Editing Looks Like
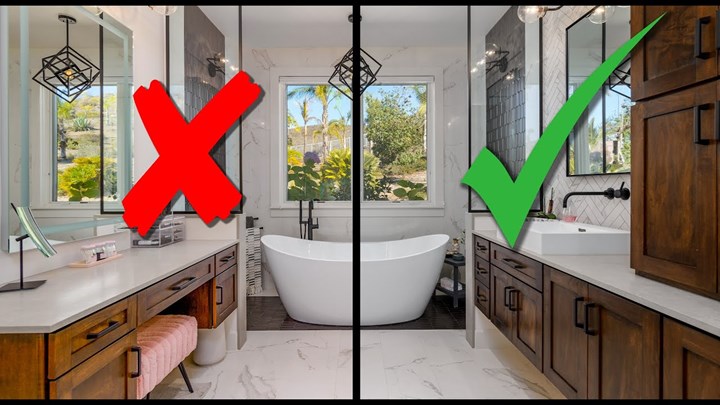
Before diving into the process of how to edit real estate photos, it’s important to understand the end goal. Professional real estate editing is subtle, intentional, and consistent. It enhances what’s already there rather than creating something artificial.

A professionally edited real estate image typically feels bright but not overexposed, with natural color tones that reflect how the space would look in person. Vertical lines—such as walls, doors, and windows—are perfectly straight, giving a sense of structure and stability. Shadows are softened just enough to reveal detail, while highlights are controlled to avoid losing information, especially around windows.
Perhaps most importantly, a professional edit ensures that every image within a listing feels cohesive. When a buyer scrolls through photos, they should experience a seamless visual narrative, not a mix of different tones and lighting styles.
Essential Tools for Editing Real Estate Photos
To effectively learn how to edit real estate photos, having the right tools is essential. While there are many editing platforms available, professionals tend to rely on a combination of software that balances efficiency and control.
Most workflows begin in Adobe Lightroom, where photographers handle bulk adjustments such as exposure, white balance, and color correction. Lightroom is particularly powerful because it allows you to apply consistent edits across multiple images, which is critical in real estate.
For more detailed retouching, Adobe Photoshop is often used. This is where advanced techniques such as object removal, sky replacement, and window masking come into play. Photoshop provides pixel-level control, making it ideal for refining the final image.
In recent years, AI-powered tools like Luminar Neo have also gained popularity. These tools can automate tasks like sky replacement and lighting adjustments, making them useful for speeding up workflows while maintaining quality.
While mobile apps can be helpful for quick edits, professional-level real estate editing is best achieved on desktop software where precision and control are significantly higher.
Step-by-Step Workflow: How to Edit Real Estate Photos Like a Pro
Step 1: Correct Exposure and White Balance
The foundation of how to edit real estate photos starts with lighting. Real estate images often suffer from mixed lighting conditions—natural daylight from windows combined with artificial indoor lighting. This can create uneven tones and color casts.
Start by adjusting the overall exposure to brighten the image slightly. The goal is to create an airy, welcoming feel without washing out details. Then, correct the white balance to neutralize any yellow or blue tint. Walls, ceilings, and neutral surfaces are useful reference points when fine-tuning color temperature.
A well-balanced image at this stage sets the tone for all further edits.
Step 2: Balance Highlights and Shadows
One of the most challenging aspects of how to edit real estate photos is handling dynamic range. Windows are often much brighter than interiors, leading to blown-out highlights and dark shadows.
Lowering highlights helps recover details outside the windows, while raising shadows reveals features inside the room. The key is balance—over-adjusting can flatten the image and remove depth. A subtle contrast adjustment can help maintain dimension while keeping the image visually appealing.
Step 3: Fix Perspective and Straighten Lines
Perspective correction is one of the defining steps in professional real estate editing. Even slightly tilted vertical lines can make a property look distorted or unprofessional.
Using transform tools, align vertical lines so that walls, doors, and windows appear straight. This creates a more polished and architecturally accurate image. Cropping also plays a role here, helping to center the composition and remove unnecessary distractions at the edges of the frame.
This step alone can dramatically elevate the quality of your images when learning how to edit real estate photos.
Step 4: Enhance Colors Naturally
Color enhancement should always be subtle. Increasing vibrance slightly can bring life to the image without oversaturating it. Unlike saturation, vibrance targets muted tones, making it a safer adjustment for real estate photography.
The goal is to create a warm, inviting atmosphere while keeping colors realistic. Wood tones should look rich but not orange, and whites should remain clean and neutral. Over-editing colors can quickly make a property feel artificial, which reduces trust with potential buyers.
Step 5: Sharpen Details and Reduce Noise
Sharpness adds clarity and professionalism to an image. However, it should be applied carefully. Over-sharpening can introduce harsh edges and noise, especially in low-light areas.
Noise reduction is particularly important for interior shots taken in darker conditions. A balanced approach ensures the image remains crisp without losing natural texture.
Step 6: Sky Replacement and Exterior Enhancement
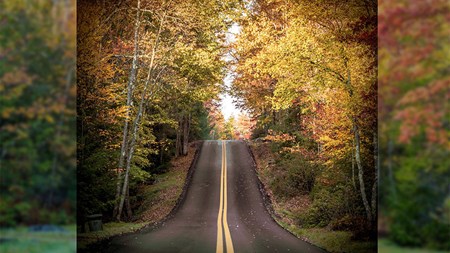
Exterior photos benefit greatly from sky enhancement. A dull or overexposed sky can make an otherwise beautiful property feel unappealing.
Replacing the sky with a bright, natural-looking version can instantly improve curb appeal. The key is realism—lighting direction, color temperature, and brightness must match the rest of the image. When done correctly, sky replacement feels seamless and enhances the overall mood.
Step 7: Remove Distractions and Clean the Scene
Even small distractions can draw attention away from the property itself. Editing allows you to remove elements that clutter the image, such as cords, stains, or minor imperfections.
This step is not about altering the property but about presenting it in its cleanest, most appealing state. Buyers should focus on the space—not the distractions within it.
Step 8: Window Pull and Advanced Blending
One of the more advanced techniques in how to edit real estate photos is the “window pull.” This involves blending multiple exposures to retain detail both inside the room and outside the window.
The result is a balanced image where the view outside is visible and the interior remains properly lit. While this technique requires more skill, it significantly enhances image quality and is commonly used in high-end listings.
Step 9: Maintain Consistency Across the Entire Listing
Consistency is what separates good editing from professional editing. Each photo in a listing should share the same brightness level, color tone, and style. Using presets in Lightroom can help maintain uniformity, especially when editing large batches of images. A cohesive visual presentation builds trust and creates a more immersive experience for buyers.
Common Mistakes When Learning How to Edit Real Estate Photos
Many beginners make the mistake of overediting. Excessive HDR effects, overly saturated colors, and unnatural lighting can make images look unrealistic. Instead of attracting buyers, these edits can create doubt about the property.
Another common issue is ignoring perspective correction. Even well-lit images can feel unprofessional if vertical lines are slightly off. Similarly, inconsistent editing across photos can disrupt the flow of a listing and reduce its overall impact. Mastering how to edit real estate photos is as much about avoiding these mistakes as it is about applying the right techniques.
Advanced Techniques for High-End Real Estate Editing
As you become more confident in how to edit real estate photos, you can explore advanced methods such as HDR blending and flambient photography. HDR combines multiple exposures to balance lighting, while flambient blends flash and ambient light for a more natural look.
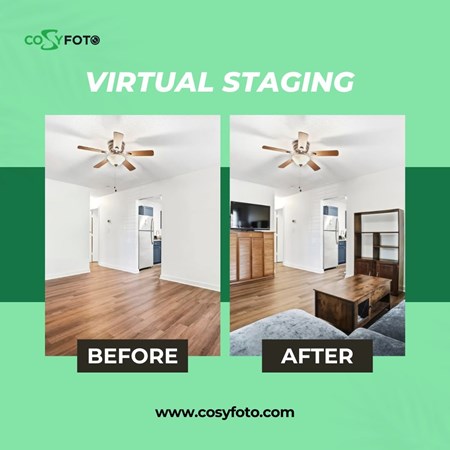
Layer masking in Photoshop allows for precise adjustments to specific areas of an image, offering greater control over the final result. Virtual staging is another powerful tool, enabling you to digitally furnish empty spaces and help buyers visualize the property’s potential.
How CosyFoto Elevates Real Estate Photo Editing
For many real estate professionals, the biggest challenge is not knowing how to edit real estate photos—it’s finding the time to do it consistently at a high level. This is where CosyFoto becomes a valuable partner.
CosyFoto specializes in real estate photo editing, offering a streamlined solution for agents, photographers, and property marketers who need high-quality visuals without the time investment. Instead of spending hours adjusting exposure, correcting perspective, and refining colors, users can rely on CosyFoto to deliver polished, listing-ready images with fast turnaround times.
What sets CosyFoto apart is its focus on both quality and scalability. Whether you’re managing a single listing or handling multiple properties per week, the platform ensures consistent results across every image. From basic corrections like brightness and white balance to advanced enhancements such as sky replacement and object removal, CosyFoto’s editing process is designed to align with professional real estate standards.
Beyond editing, CosyFoto also supports the broader visual storytelling process. High-quality images produced through the platform help listings stand out across websites, social media, and marketing campaigns. This is particularly important in competitive markets, where visual presentation can directly influence buyer engagement and lead generation.
For agents and teams looking to scale their operations, outsourcing to CosyFoto is not just about convenience—it’s about maintaining a professional brand image while saving time and resources. Instead of juggling editing tasks, you can focus on what matters most: closing deals and growing your portfolio.
Final Thoughts: Mastering How to Edit Real Estate Photos
Learning how to edit real estate photos is one of the most impactful skills you can develop in the property industry. It bridges the gap between a standard listing and a high-performing one, influencing everything from first impressions to final offers.
With the right tools, a structured workflow, and attention to detail, you can transform ordinary images into compelling visuals that attract buyers and drive results. And as your needs grow, solutions like CosyFoto can help you maintain quality at scale without sacrificing efficiency.
At the end of the day, great real estate photography is not just about showing a property—it’s about helping buyers imagine their future inside it.
 alt="">
 alt="">
 alt="">
 alt="">
 alt="">
 alt="">
 alt="">
 alt="">
 alt="">