Direction for installing and editing photos with Adobe Lightroom mobile
Photo Editing
2021/04/07
In the past, we often had to resort to computers to install photo editing software for post production. But now you can easily download and use editing applications right on your smartphone. Among them, Lightroom mobile is one of the greatest apps commonly used. This post will introduce how to install and edit photos with Adobe Lightroom mobile.
With many convenient features such as blur, brightness, color correction... Lightroom is a professional photo editing software favored by many photographers to edit and design aesthetic images. In addition, this application also has various filters for users to freely perfect their pictures according to their own style. Lightroom is available on both Windows and MacOS platforms and is supported on 2 mobile platforms, Android and IOS with Lightroom Mobile app.
How to install Adobe Lightroom mobile on your phone
Here are the steps to install this app on Android, but you can also do the same for iOS.
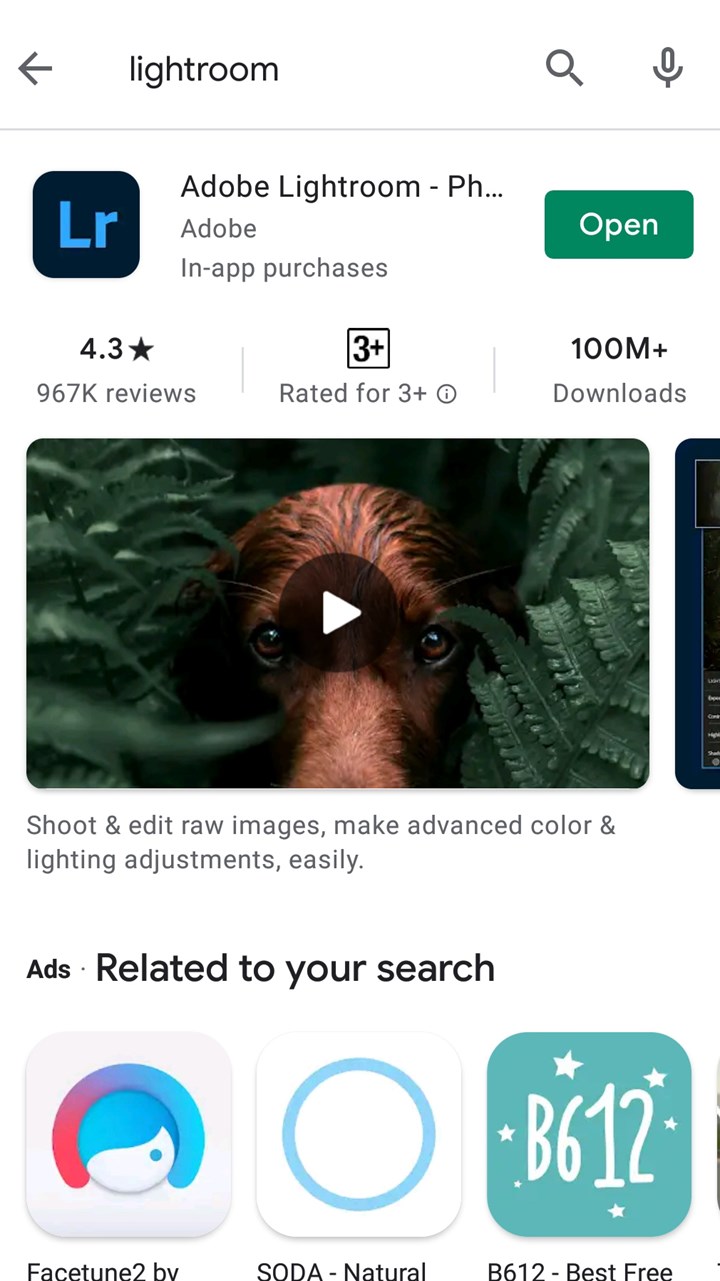
Step 1. At the main interface of the Google Play, click on the Search box.
Step 2. Enter the keyword Adobe Lightroom and tapilck the Search button.
Step 3. Next, tap the Install button.
Step 4. Please wait a while for this application to be completely downloaded to your phone. Then tap the Open button to start using Lightroom mobile.
Or you can download this application by the two links below
Sign up for an Adobe account
All Adobe's software and applications are synchronized with one account. And so does Lightroom. Therefore, what you need to do first is to create an Adobe account. You can sign up using your Adobe, Gmail or Facebook account.
Changing the basic default in Lightroom
In the Preferences section on the Lightroom mobile interface, you should adjust the settings as the followings
- Turn off the Auto Add New Photos option to avoid photos automatically adding to the app. This will help to reduce the situation that application becomes the stutter, lag when the phone’s configuration is not strong enough but there are too many photos to store.
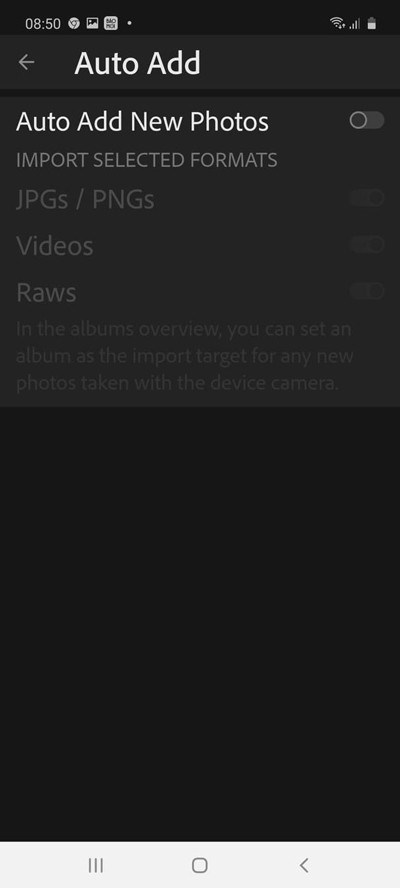
- Turn on all 3 options as shown above to help JPGs extension - PNGs / video / Raw file format (a format of a digital camera) you need to edit will be fully supported by the app.
In the Photo Import Options section, you choose All Files to be able to add all the photo options to Lightroom mobile.
Procedure to edit with Lightroom mobile
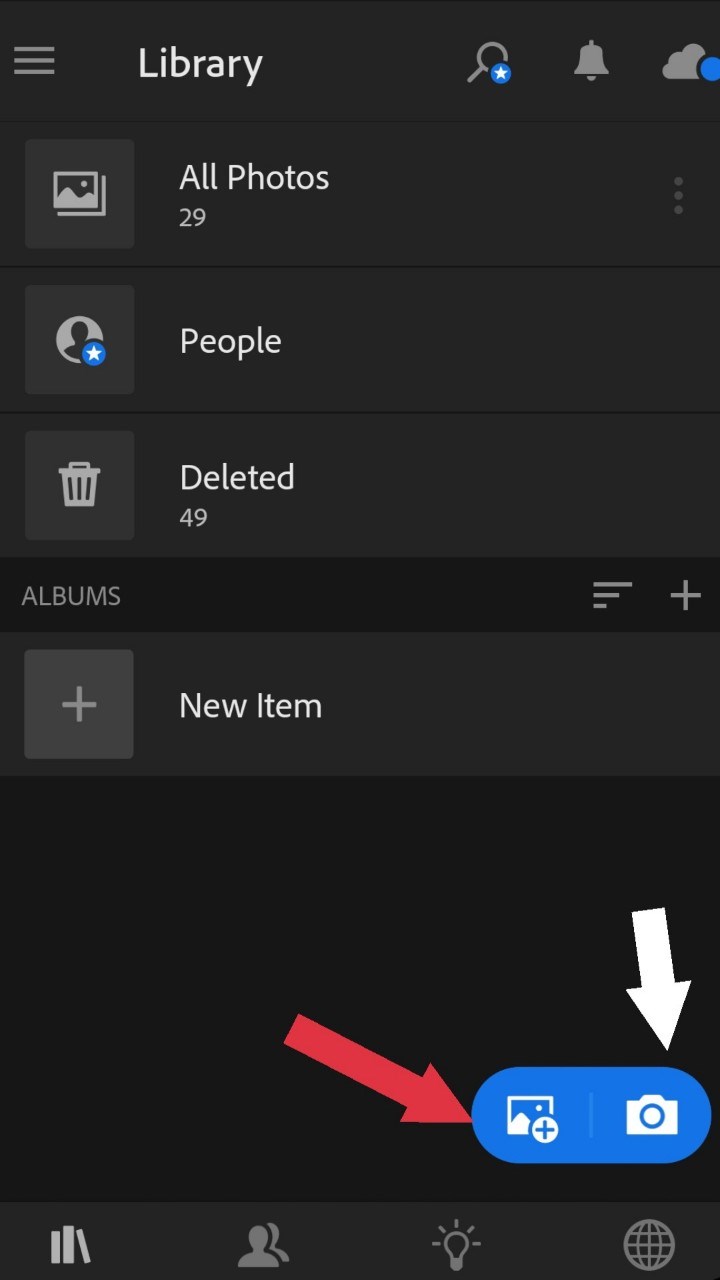
Step 1. In the main interface of the application, tap on Add photo. You can add photos from the library by tapping the "+", and tapping the camera icon to take a photo.
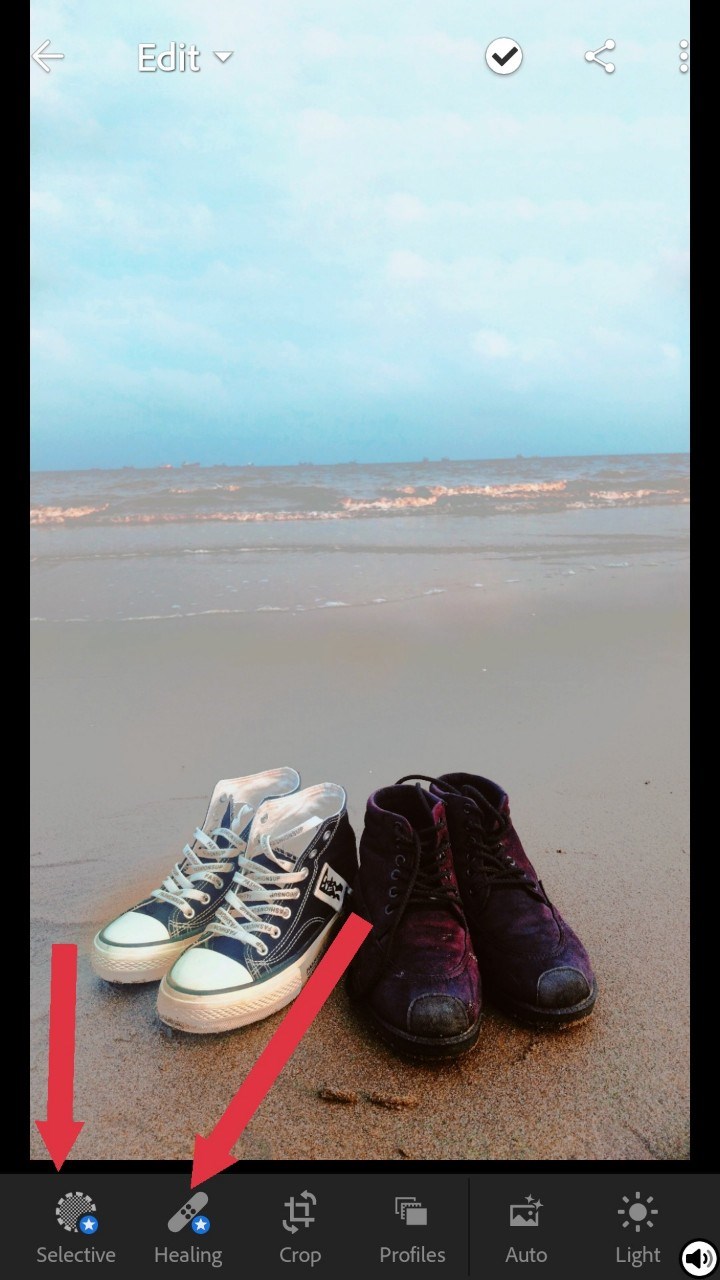
Step 2. After you have obtained the image, edit the image with the tools available on the application.
Note: At Adobe Lightroom, there are some photo editing tools that need to be purchased to use. These tools are often attached with a star to differentiate with others. For example: Selective, healing Brush and Geometry.

Step 3. After you have finished all the editings, tap the share icon at the top of the screen.
Step 4. Click Save to Device.
Step 5. Wait a moment for the application to export the image to your phone. When you have saved the edited photo, you will see the message "export completed" on the screen.
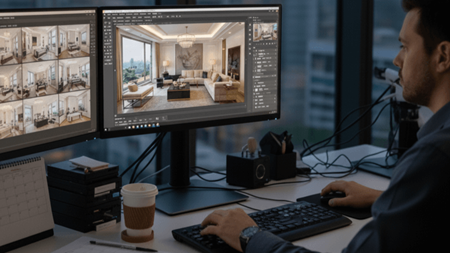
Professional editing in Lightroom mobile
All images that you have imported into Lightroom mobile app for post production will be saved in the All Photos section. Now you can start editing for the most professional photos.

You can tap each picture in this album to view information and edit them. These options will be listed in the top left corner of the screen.
The information of a photo includes: name, size, format, shooting time, device, focal length, shutter speed, aperture… Find the Edit item in the list of options.
More information for photography tips for beginners here
Detail information about the function of each tool in Adobe Lightroom mobile app
1. Crop & Rotate
This is a set of tools to help adjust the composition and the size of the photo. This turns the off-angle photos more professional and balanced.
Crop: Crop the photo in whatever ratio and shape you want. There are various available cropping frame ratios for users to choose.

Straighten: Rotate the image at will.
Rotate L&R: Rotate the photo 90 degrees to the left or 90 degrees to the right.
Flip H&V: Horizontal or vertical mirror flip mode
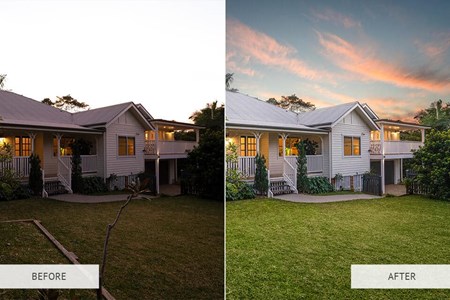
2. Light
This is a toolkit helping adjust the lightness/ darkness of the image. It is among the most important tools that users commonly use in Lightroom mobile because it noticeably improves the images.
Exposure: Adjust the lightness / darkness of the whole picture.
Contrast: modify the image contrast. Decides the harmony between light / dark areas.
Highlight: Changes the brightness and darkness of bright areas in the image.
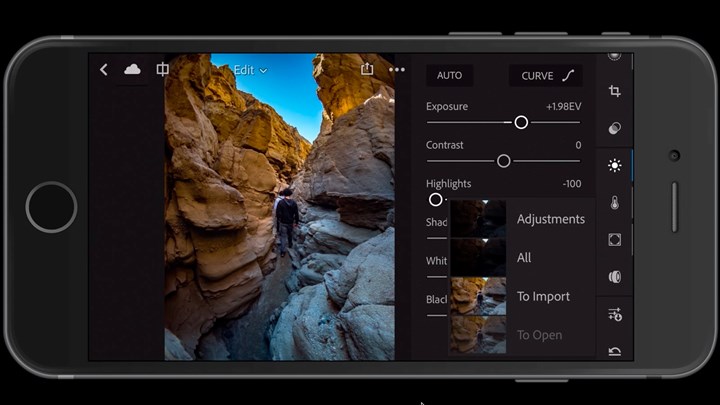
Shadows: A tool to adjust the shadow area.
Whites: Change the lightness / darkness of low light areas.
Blacks: Tool to modify the dark areas of the photo.
Curve: A graph of the color rendering of the image. Includes a light adjustment tool similar to the above tools. However, this toolkit includes 3 small tools to assist the user to modify the 3 primary colors: red, green and blue. It is relatively difficult to use.
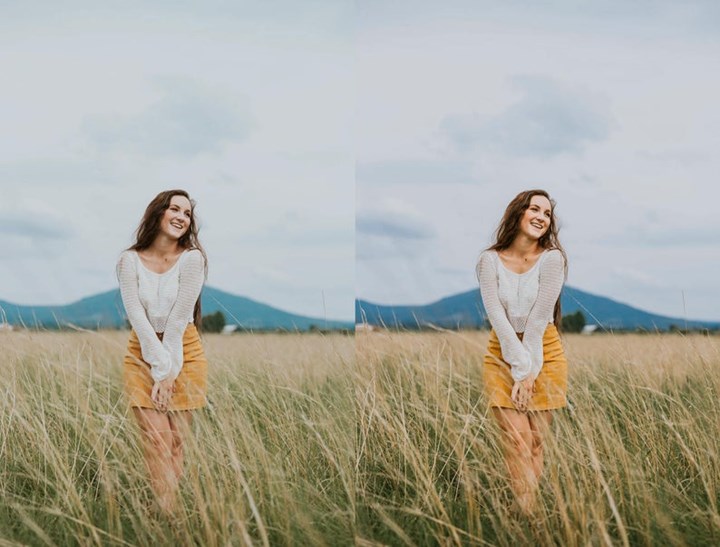
3. Color
This is the most important toolkit which allows users to control the image color. It helps to create the diversity of colors for the picture and shows the photographer's personality and creativity.

Temp: Change the color temperature of the photo. Add more blue (cooler) or more orange (warmer) to the image.
Tint: Adds a blue or pink tone to the photo.
Vibrance: Increase or decrease the vibrancy of the image’s colors to the saturation.
Saturation: Increases or decreases color vibrancy depending on the user.
B&W: Photos with 2 basic colors: black and white.
Mix: This is the most important tool deciding the color of the image according to the user's preference. The set includes 8 primary colors. Each color has 3 toolbars: Hue, Saturation and Luminance.• Hue: Change the color of the photo depending on the currently selected color
• Saturation: The vibrancy of the currently selected color
• Luminance: The brightness of the currently selected color
The pen icon tool helps users with auto white balance by touching the white areas.
4. Effect
This toolkit allows the users to modify small details, sharpness and features to increase the depth of the image.

Texture and Clarity: Adjust the sharpness of the photo.
Dehaze: Make the photo clearer, increase the depth of the photo
Vignette, Midpoint, Feather, Roundness: surround the photo with white or black shadow. Adjust the blur, the coverage of the surrounding. This set of tools helps to highlight the key subject.
Grain, Size: Gives the grain to the image and decides the grain size. This is a very popular tool when creating styles like film photos.
5. Detail
This is a set of tools to help users improve the detail of a photo. In fact, this toolkit can not improve too much image detail. But through small tricks, it can make the image looks better.
Sharpening, Radius, Detail, Masking: Increase sharpness of image details and adjust grain coverage.
Noise Reduction, Detail, Contrast: Tools for blurring image details and adjusting fine-grained coverage. Skin softening can also be applied to portraits.
Color Noise: Reduces color contrast in image details.
6. Optics
This toolkit provides maximum support for users, eliminating some hassles when using the DSRL camera.
The tool can identify which camera the edited photo was taken with and the lens parameters. Also, auto edit appropriately.
For example, This tool will help remove dark borders or distorted edges in a photo taken with a DSRL camera.
7. Presets
In essence, it is an output file to contain all the previous adjustments of the image. Preset helps users to batch edit photos quickly if the images have similar parameters.
Presets help shorten the editing time. Thanks to the present, users can refer to edits of experienced people. In addition, they can create new edits when adjusting parameters from available presets.

8. Profile
This is a tool that contains the primary color filters available in lightroom. At will, the user can quickly process the image color according to the filter concept.

9. Auto
This is a light processing tool with only one step. It is quite convenient because it helps to quickly adjust balance light, saturation suitably.
Conclusion
With these basic tools, users can completely create their own artistic photos. Hopefully, some information above will help you master the Lightroom mobile app in your own smartphone.
 alt="">
 alt="">
 alt="">
 alt="">
 alt="">
 alt="">
 alt="">
 alt="">
 alt="">