
How to Maintain Quality at High Volume: A Guide for Real Estate Photographers
Photo Editing
2026/09/28
Growth is usually a good problem to have. More shoots mean more clients, more revenue, and more opportunities to expand your real estate photography business. But as volume increases, another challenge quickly appears: maintaining the same level of quality across every listing.
Editing 30 photos from one property is very different from processing hundreds of images across several properties every day. When the workload increases, small inconsistencies become easier to miss. White balance may vary between rooms, window pulls may look different from one listing to another, images may become overprocessed because editors are rushing, and delivery deadlines can become harder to manage.
For photographers and real estate media agencies, the goal shouldn't simply be to process more images. It should be to create a system capable of handling higher volume while protecting the quality clients expect. That's where a structured high volume real estate photo editing workflow becomes important.
Why Quality Becomes Harder as Volume Increases
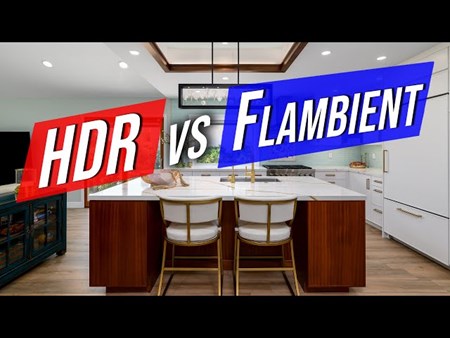
At lower volumes, photographers can often compensate for inefficient processes with extra time. You might spend another 20 minutes perfecting a difficult kitchen image, review an entire gallery twice, or manually correct small inconsistencies before delivery. At higher volumes, those extra minutes multiply. If you photograph five properties in a day and deliver 30 images for each one, that's already 150 final images. Add HDR brackets or flambient exposures, and the number of source files can quickly become much larger.
Suddenly, post-production isn't just a creative task. It becomes an operational challenge. The risk is that speed starts replacing consistency, especially when several listings need to be delivered at the same time. The solution isn't to lower your standards. It's to create systems that make those standards easier to maintain regardless of how many properties are moving through your workflow.
1. Define What “Quality” Actually Means
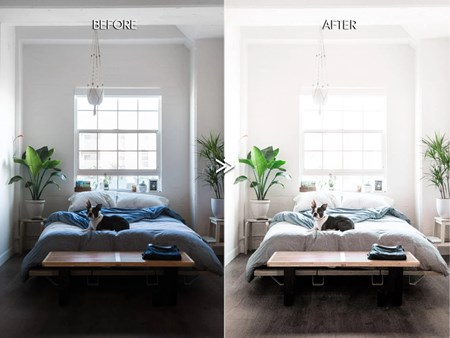
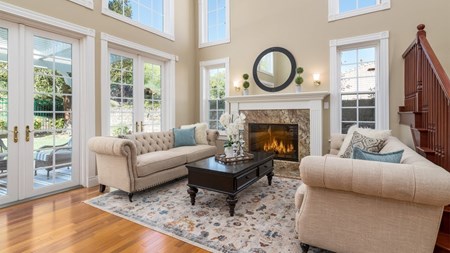
Before you can maintain quality at scale, you need to define it. “Make the photos look good” isn't a useful production standard because different photographers or editors may interpret it differently. Instead, define the characteristics you expect from every completed gallery. Your standard might include natural white balance, balanced exposure, realistic window views, straight vertical lines, controlled highlights, clean colors, consistent contrast, and natural-looking exterior tones.
The exact preferences will depend on your photography style. Some photographers prefer brighter interiors, while others want stronger contrast and more natural shadows. Some clients prefer clearly visible window views, while others want windows to remain brighter and softer. There isn't one universal editing style. What matters is creating a clear visual standard that can be understood, communicated, and repeated across hundreds of images.
2. Standardize Your Shooting Process
High-volume editing starts before the files ever reach post-production. A consistent capture process produces more predictable source files, which makes editing easier and faster. Try to maintain repeatable habits for camera height, exposure brackets, flash placement, white balance, and composition. For HDR workflows, use a consistent bracketing method whenever possible. For flambient photography, organize flash, ambient, and window exposures in a predictable sequence.
The more consistent your source files are, the fewer decisions an editor needs to make later. This becomes especially valuable when multiple photographers work for the same real estate media company. If every photographer captures properties differently, the editing team has to solve a different puzzle for every listing. Standardized capture reduces that variability and makes it easier to produce a consistent final result.
3. Create Clear Editing References
Written instructions are useful, but visual references are often more effective. Build a collection of completed images that represent your preferred editing style and include several different situations: bright interiors, darker rooms, kitchens, bathrooms, window-heavy spaces, exteriors, twilight photographs, and properties with mixed lighting.
These examples create a visual benchmark. Instead of telling an editor that you want “natural colors,” you can show exactly what natural colors mean for your brand. Instead of requesting “clean window pulls,” you can provide examples showing how bright or detailed you prefer the exterior view to be. Reference images become increasingly valuable as volume grows because they reduce interpretation and make quality less dependent on someone remembering individual preferences.
4. Organize Files the Same Way Every Time
File organization may not seem directly related to image quality, but at high volume, poor organization creates mistakes. When hundreds or thousands of source files are moving through a workflow, editors need to immediately understand which images belong together. Use a consistent folder and file naming structure for every property.
For example, HDR brackets, flash exposures, ambient exposures, window exposures, special retouching requests, and final images should be easy to identify. The exact structure matters less than consistency. A predictable system reduces the chance that exposures are combined incorrectly, special instructions are missed, or images from different properties become mixed. It also makes revisions easier because everyone can quickly locate the relevant source files.
5. Separate Standard Editing From Special Requests
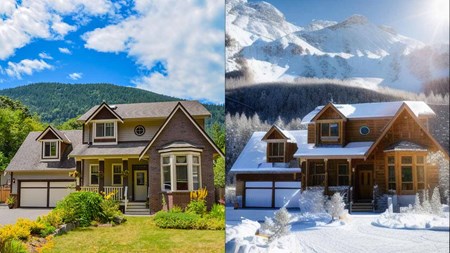
Not every image needs the same amount of work. Most photographs may only require your normal editing process, while a smaller number need advanced attention. A hero exterior might need detailed retouching, a living room may require object removal, an empty bedroom might need virtual staging, or an exterior could be selected for day-to-dusk conversion.
If special requests are mixed into general instructions, they become easier to miss as production volume increases. Create a simple system for flagging them before files reach the editing stage. This allows standard images to move efficiently through the normal workflow while more complex edits receive the additional attention they require. It also helps prevent an advanced edit from slowing down an entire gallery unnecessarily.
6. Build Quality Control Into the Workflow
Quality control shouldn't happen only when something looks obviously wrong. It should be a defined stage of production. Before delivering a listing, review the gallery as a complete set rather than only checking individual images. Look for differences in brightness, white balance, saturation, contrast, and window treatment. Compare multiple angles of the same room to make sure walls, floors, cabinetry, and other major surfaces maintain reasonably consistent colors.
For exterior photographs, compare the sky, grass, landscaping, and building colors across the gallery. Check vertical lines, especially in kitchens, bathrooms, and rooms with strong architectural features. A short, structured quality check can prevent a much longer revision process later. At high volume, the goal isn't to inspect every pixel. It's to know exactly which problems you're looking for and catch them before delivery.
7. Use a Simple Quality Checklist
When you're busy, memory isn't a reliable quality-control system. A checklist is. Before approving a gallery, confirm that exposure is balanced, white balance is accurate, vertical lines are straight, colors remain consistent, windows look natural, distracting color casts have been corrected, and the entire gallery feels connected.
Advanced services should have their own checks as well. Virtual staging should be reviewed for perspective, scale, shadows, lighting, and furniture placement. Day-to-dusk images should be checked for believable skies, realistic interior lighting, and natural transitions between the property and its new evening environment. A short checklist creates a repeatable standard that can be used regardless of whether you're delivering two properties or twenty.
8. Reduce Revisions at the Source
Revisions become expensive at high volume. One correction might only take a few minutes, but if the same issue appears across ten listings every week, it becomes a significant drain on production time. Track repeated feedback instead of treating every revision as an isolated problem.
If you're repeatedly asking for warmer white balance, cleaner windows, lower saturation, brighter shadows, or more natural grass, turn those preferences into permanent editing guidelines. Over time, your revision history should improve your production standard. The workflow becomes edit → review → identify the pattern → update the standard → reduce future revisions. The
 alt="">
 alt="">
 alt="">
 alt="">
 alt="">
 alt="">
 alt="">
 alt="">